These instructions describe how to connect your TIM Plus system to a Microsoft Teams account, allowing you to analyse your Teams calls in the same way as standard phone calls.

<a id="Configure the SMDR output"></a> |
Configuring TIM Plus
These instructions help you configure your MS Teams to send data to TIM Plus.
Add a new data source
Connecting TIM Plus to your Microsoft Teams account is very similar to the way you connect to any other PBX or communications service:-
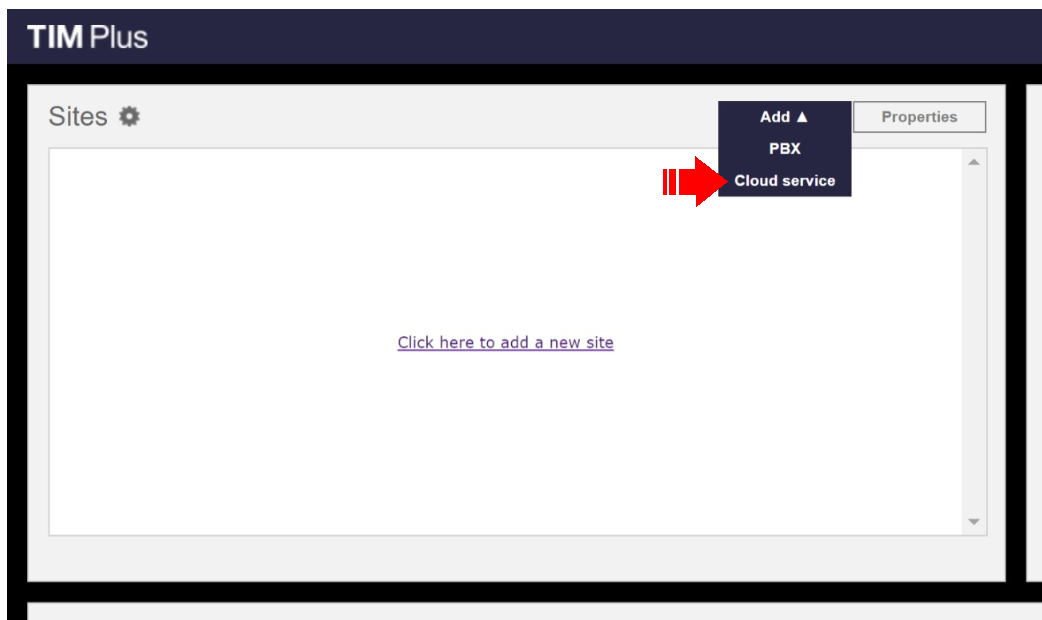
- Go to the Directory tab, click on Sites and select Add

2. Select Cloud service from the dropdown list.

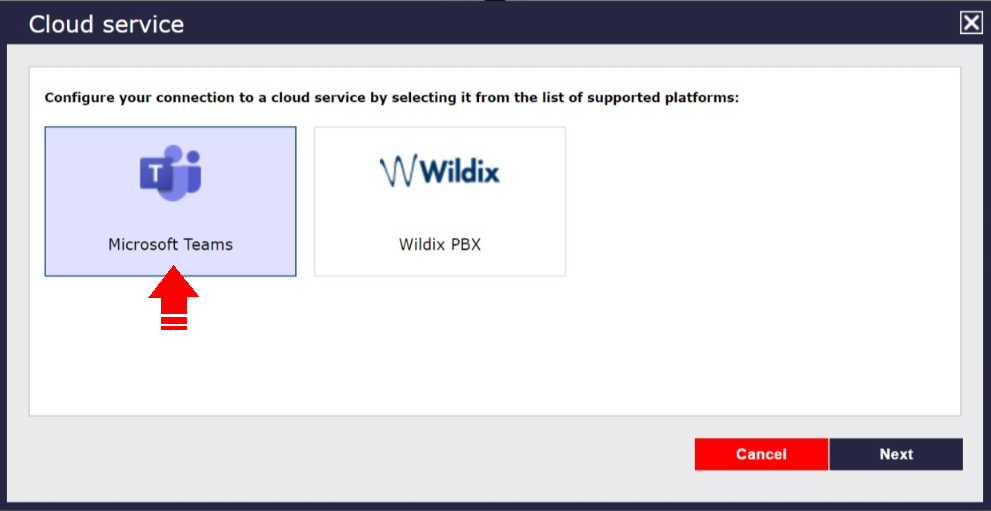
3. Select Microsoft Teams as the cloud service for connection

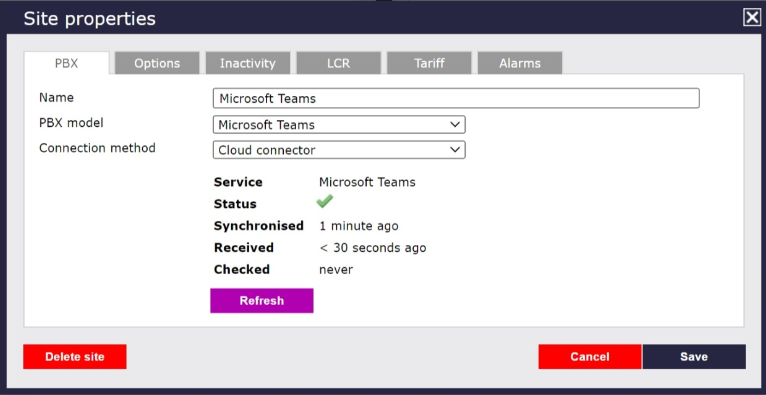
4. Select Site properties and click on the PBX tab

5. Set the PBX model as Microsoft Teams as shown below. Once TIM is authorised to receive data from Microsoft, details of when data was last received will also show.

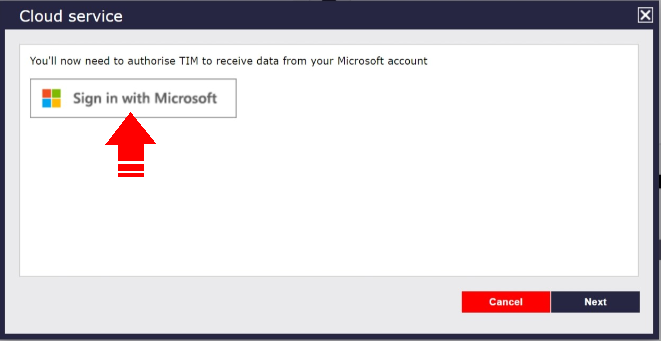
6. You will need to sign in to Microsoft to authorise TIM Plus to receive data from your Microsoft account


