Channels
Overview
Channels are system objects representing your telephone lines. When you first configure TIM Plus, your channels are automatically harvested from the data received from the phone system, into a folder named Discovered Users. The properties of each user can be edited afterwards, and users can also be subsequently organised into new users groups, if preferred.
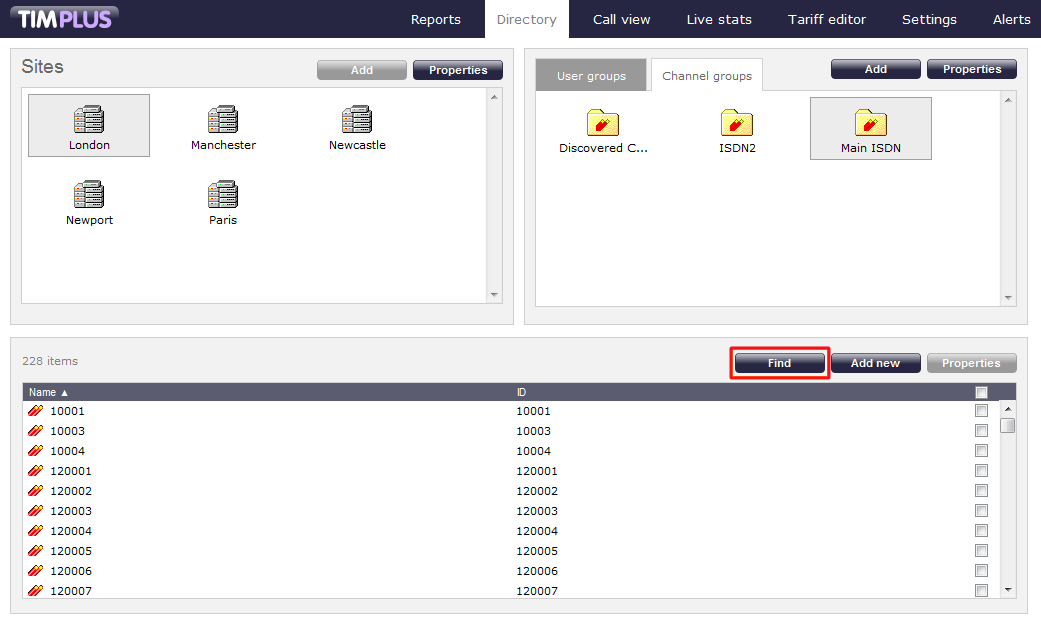
Finding a channel
To search for a channel in the system and see in which group it is located, select the tab and click on the button at the top-right corner of the screen:
To located a channel in the Directory, select the tab and click on the button at the top-right corner of the Contents panel, as shown below:
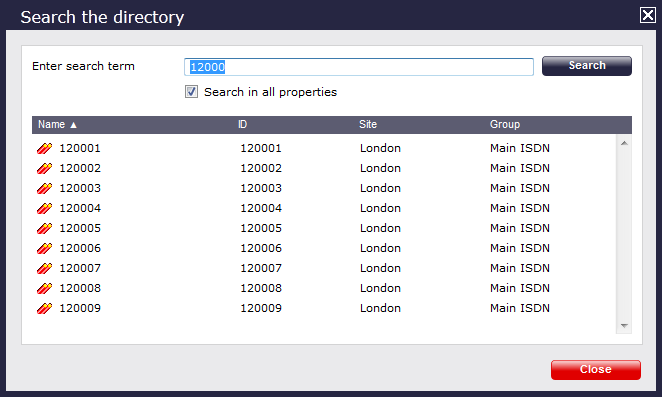
In the new window that opens, enter the name or extension number of the channel you are looking for, then click on the button. The results will appear in the same window, as shown below:
Adding a channel
Before adding a new channel in the system, search for the channel number in the Directory to ensure you are not creating duplications. |
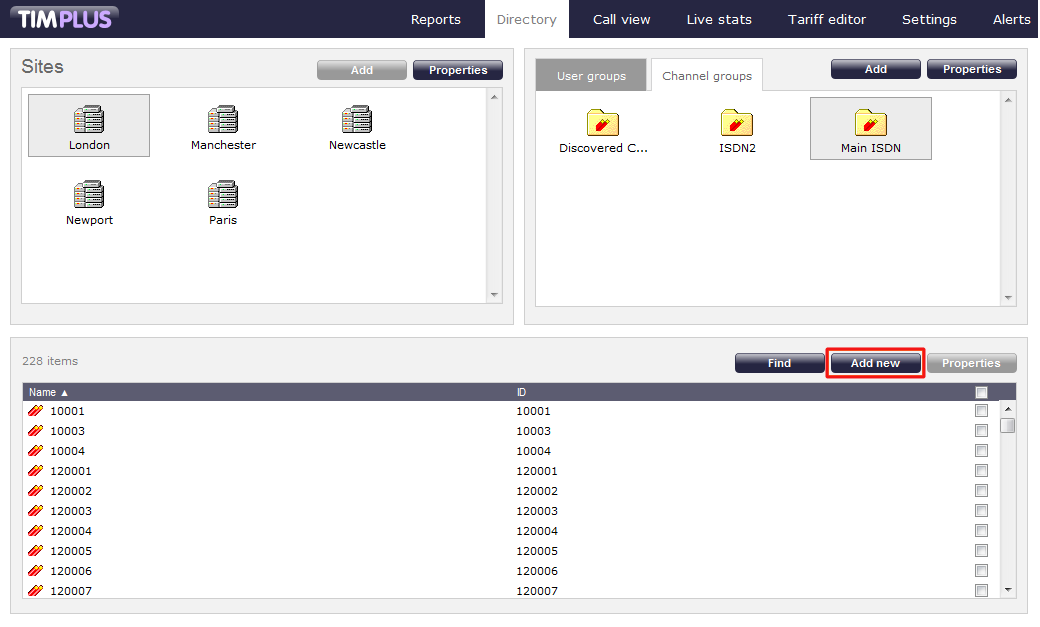
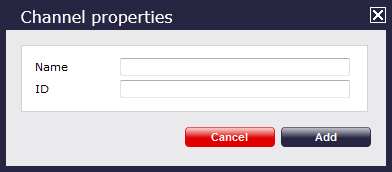
To manually add a channel in the system, click on the tab and select the site and group where you want to add the new channel, then click on the button at the top-right corner of the Contents panel:
A new window will open, allowing you to configure the properties of the channel:
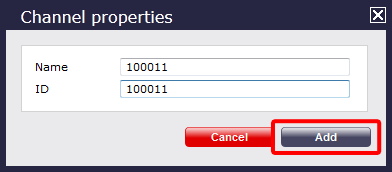
Once you have configured the channels 's properties, click on the button, as shown below:
Editing a channel's properties
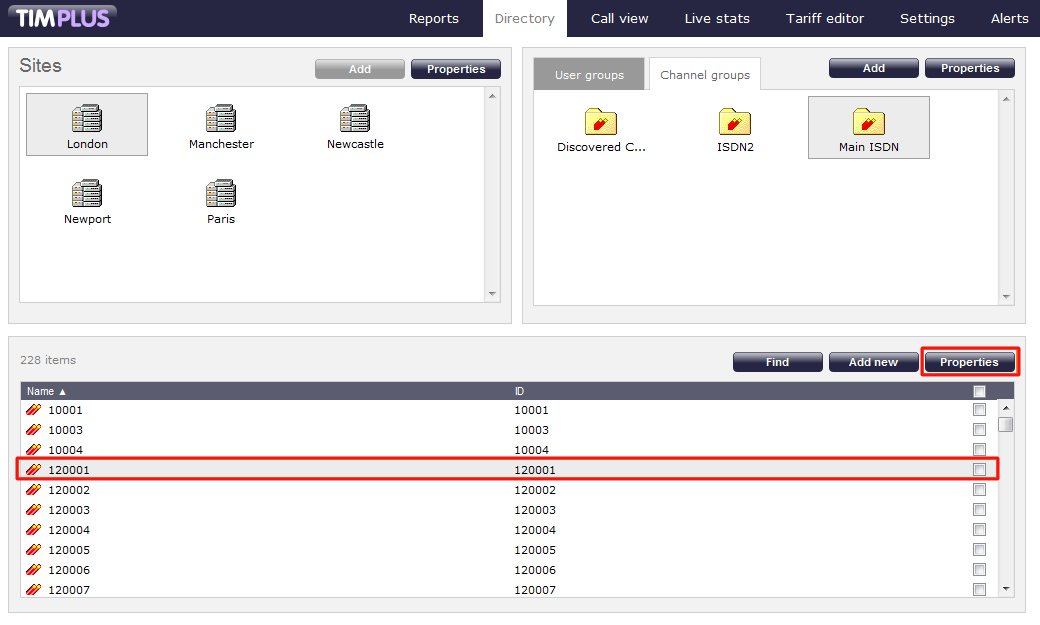
To edit a channel's properties, locate the channel in the Directory, select it and click on the button at the top-right corner of the Contents panel:
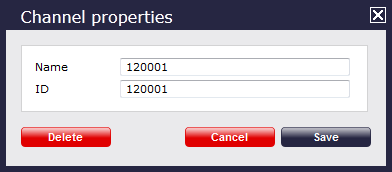
A new window will appear allowing you to edit the channel's properties. Overtype any details you would like to change, as shown below:
Moving a channel between two groups
Follow the steps below to move a channel from one group to another.
- Click on the tab and locate the channel you want to move over to the new group.
- Select the channel, by ticking the box alongside it. The top-left panel of the screen will now change to the Move items panel and the selected channel will be copied here.
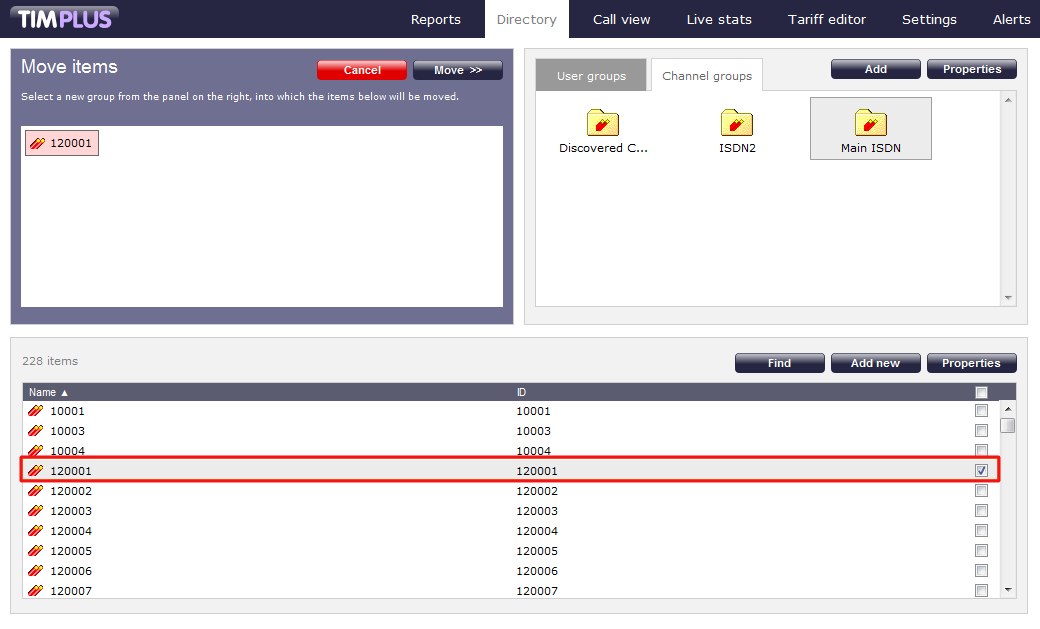
- Next, select the group you want the channel to be moved into, and click on the button. The channel is now moved to the new group.
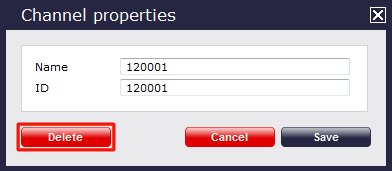
Deleting a channel
To delete a channel from the system, select it and click on the button at the top-right corner of the Contents panel:
In the Channel properties window that will open, click on the button to remove the user from the Directory; a confirmation will be required, to prevent users being deleted accidentally.