These instructions help you configure your VoIPCortex phone system to work with TIM Plus. Contact your system maintainer if you are not familiar with the configuration of your PBX.
Connection Type
Support Files
Required Tasks
Configuring your SMDR output
Follow the steps below to enable the SMDR output on your VoIPCortex phone system:
- Log in to the VoIPCortex phone system using your admin username and password.

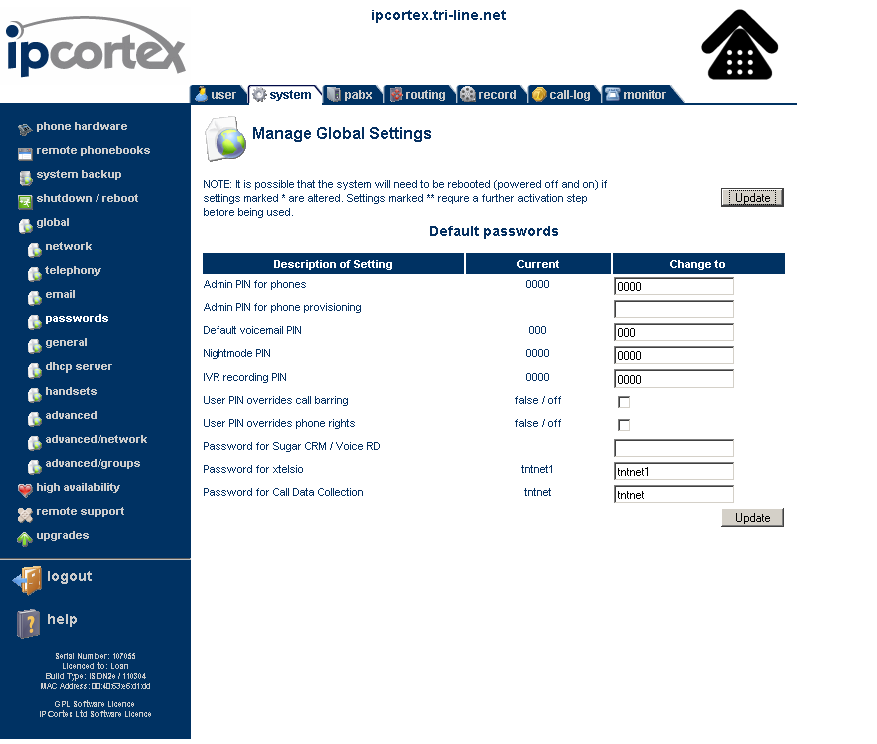
- Click on the System tab and from the left-hand side menu expand the Global tree node.
- In the Passwords section, create a password to allow event to be retrieved by TIM Plus, as shown below:

- Once you have completed the configuration, restart the phone system for the changes to take affect.
Configuring TIM Enterprise
Follow the steps below to configure TIM Plus to collect SMDR data from your VoIPCortex phone system:
- Click on the tab.
- Choose the PBX object you want to configure and click Properties.
- A new window will open. In the tab, select VoIPCortex from the Data format list and tick the Keep a local backup of data box, as shown below:

- In the tab, select Establish TCP connection to PBX from the Connection method list.
- In the Host field, enter the IP address of your VoIPCortex.
- In the Port field, enter 5038.
- In the Username field, enter xtelsio.
- In the Password field, enter the password you configured in the phone system.
- In the IP script field, select VoIPCortex from the drop-down list.
- In the Connection options, enable the Timestamp data field.
- Click on the button to apply the settings.

Labels: