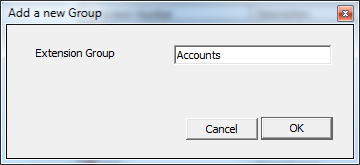
To add a new trunk group to the system, click on the  button at the bottom-right corner of the Extension groups panel. A new window will appear, allowing you to enter a name for the new group. Click to save the changes.

To add a trunk group just click on the  button, beneath the Trunk Groups (left-hand side) window.
The following screen appears. Type the name of your new trunk group in the text box and press

When you have finished the process, all your new trunk groups will appear on the left-hand side under the heading Trunk Groups as shown below:

Always remember to press the  button in order for your changes to take effect.
When the configuration has been saved, the changes take effect
immediately.
However, calls made prior to your changes will not necessarily reflect them, and so the system asks you what you want to do about these old calls, in the following prompt:

If you want to backdate the changes to a specific date, enter the date range over which calls should be updated to reflect your new extension configuration and press .
If you just want all calls to reflect the new set-up, click on the button.
To leave old calls as they are, without updating them, click on the button.
Depending on the magnitude of changes and the number of old calls you've asked to be updated, this may take some time. A progress indicator is shown in the status bar. When the update has been completed you will receive notification indicating whether the process was successful or not.