These instructions help you configure your Mitel 3300 phone system to work with TIM Plus. Contact your system maintainer if you are not familiar with the configuration of your PBX.
Connection Type
Support Files
Required Tasks
Configuring your SMDR output
Follow the steps below to configure the SMDR options of your Mitel 3300:
- Log in to the Mitel Communication Director software
- Click on
- Click on
- Click on
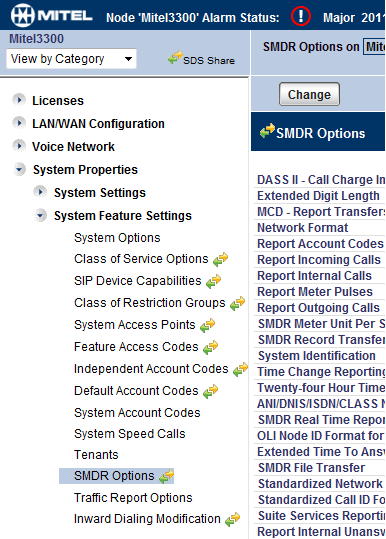
Set the SMDR options as shown below:

Configuring TIM Plus
Follow the steps below to configure TIM Plus to collect SMDR data from your Mitel 3300:
- Click on the tab.
- Choose the site you want to configure and click .

- In the Site Properties window, select Mitel 3300 from the PBX model drop-down list.
- In the Connection method field, select Actively connect to PBX from the drop-down list.
- In the Host field, enter the IP address of your Mitel 3300.
- In the Port field, enter 1752.
- Leave the Username and Password fields blank.
- In the Connection script field, select Mitel 3300 from the drop-down list.
- Click on the button to apply the settings.
Labels: