The Unused Devices report
Introduction
The Unused Devices report identifies any users and channels that haven't been utilised in a given period of time. It is useful for identifying telephone handsets that can be safely reallocated to other users or which channels are no longer used.

Running the report
On the Reports screen, select the Unused devices report from the left-hand pane and click the button.

A new window will appear, where you can set the parameters of your report.
Selecting the reporting period
For each report, you must specify a time span that covers the calls you want the report to include. This is known as the "reporting period".

There are several preset reporting periods available for selection, based on the standard Gregorian calendar. The following table describes how the start and end times are defined for each preset period:
| Period | Description |
|---|---|
| Today | The start and end dates are set to the current date. The start time is set to 00:00:00 and the end time to 23:59:59. |
| Yesterday | The start and end dates are set to the current date minus one day. The start time is set to 00:00:00 and the end time to 23:59:59. |
| This week | The start date is set to the first day of the current week (normally Monday). The end date is set to the current day. The start time is set to 00:00:00 and the end time to the current time. |
| Last week | The start date is set to the date of the last Monday, and the end date is set to the start date plus seven days. The start time is set to 00:00:00 and the end time to 23:59:59. |
| This month | The start date is set to the first day of the current month. The end date is set to the current day. The start time is set to 00:00:00 and the end time to the current time. |
| Last month | The start date for this period is set in three stages: The day is set to the first day of the month. The month is set to the previous month. The year is set to the current year, unless it is currently January, in which case, the previous year is used. The start and end times are set to 00:00:00 and 23:59:59 respectively. |
| This year | The start date is set to the first day of the first month of the current year, whilst the end date is set to today's date. The start and end times are set to 00:00:00 and 23:59:59 respectively. |
| All calls | The start and end dates and times are set to the dates and times of the first and last call in the entire call database, respectively. |
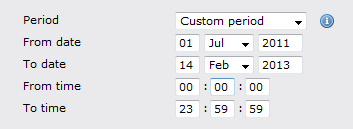
In addition to the presets described above, it is possible to specify a custom reporting period by choosing Custom period from the Period drop-down list and specifying your own Start date, Start time, End date and End time of the period you want to report on.

Once you have set the reporting period, click on the button to set additional report parameters and options, or select the button to run the report immediately.
Selecting the reporting entity
The Reporting entity parameter allows you to select the part of your organisation whose calls the report should include, e.g. a site, a group or an individual user.

Site
To report on a particular site, select it from the drop-down list or select All sites .
Group
If a site has been selected, you are able to further limit the report's results by selecting a group from the drop-down list.
User
If both a site and group have been selected, you can further limit the report's results to include only calls involving a particular user, by selecting that user from the drop-down list.
If your web account is restricted to a specific site or group, only those entities to which you have access will be available in the drop-down lists. |
Once you have selected the scope of your report, click on the button to set additional report parameters and options, or to run the report immediately, click the button.
Selecting the report options
You can limit the results of your report by choosing one or more of the following filters:

Show "Do not log" devices
Tick this box if you would like to include devices whose status is set to not log calls.
 Show "Do not log" devices
Sort order
Choose from the Sort order drop-down list whether you want the results of your report to appear in ascending or descending order.
Sort results by
To sort your report's results by a particular column, select it from the Sort results by drop-down list.
Selecting the report format
This section allows you to choose the media format of your completed report. The formats available are Web, PDF, Excel, CSV and XML.
More details about each report format are available in the Setting the report format section above.
Creating the report
When you have selected a reporting period and have chosen any filters and options, you can either run the report immediately by clicking on the button, or schedule it for future delivery.

The report's results
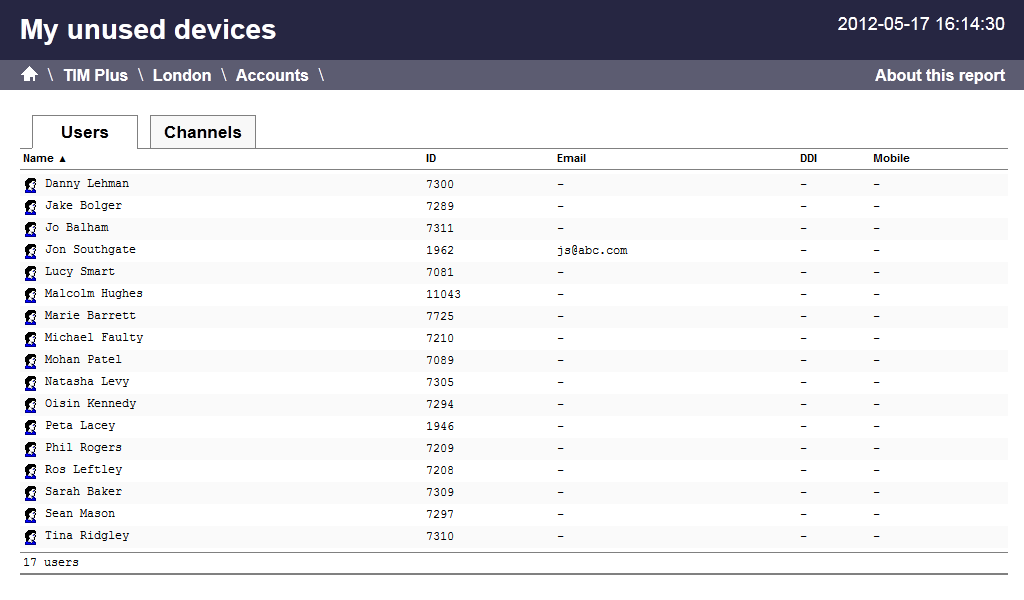
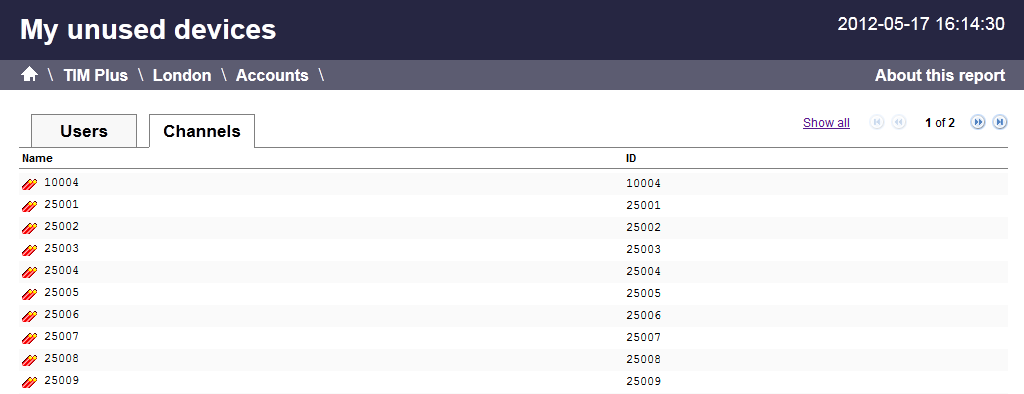
Below is an example of this report's output in Web format, showing both unused users and unused channels:


The Web format is the most interactive of all formats: all column headers are click-sortable and most graphical and tabular elements can be drilled down into, allowing deeper analysis of your results. By clicking on the About this report link at the top-right corner of the page, you can review any filters and options that have been applied to the report.
As with all reports produced by TIM Plus, each page of the report includes the following information:
- the report's title
- the date and time that the report was generated
- the name of the report, if applicable
The results will display as a paginated list of unused devices with each type of device being grouped in its own tab:
The Users tab shows the following information:
| Header | Description |
|---|---|
| Name | The name of the user |
| ID | The extension number associated with the user |
| The e-mail address associated with the user | |
| DDI | The DDI associated with the user, if available |
| Mobile | The mobile number associated with the user, if available |
The Channels tab shows the following information:
| Header | Description |
|---|---|
| Name | The name of the channel |
| ID | The ID associated with the channel |
To modify your report to cover a larger organisational scope, click on an element of the breadcrumb as shown below:
